If you want to make changes to ZAP using the Eclipse IDE then you are in the right place.
Preparation
You will need to have followed the Quick Start Guide to Building ZAP and installed a version of Eclipse suitable for Java development. We would suggest the “Eclipse IDE for Java Developers” package.
Install Lombok
Follow the instructions on https://projectlombok.org/setup/eclipse#via-eclipse-plugin-installer
Import the ZAP Repositories
In Eclipse select the ‘File’ menu, then ‘Import…’, and then ‘Gradle’ → ‘Existing Gradle Project’:
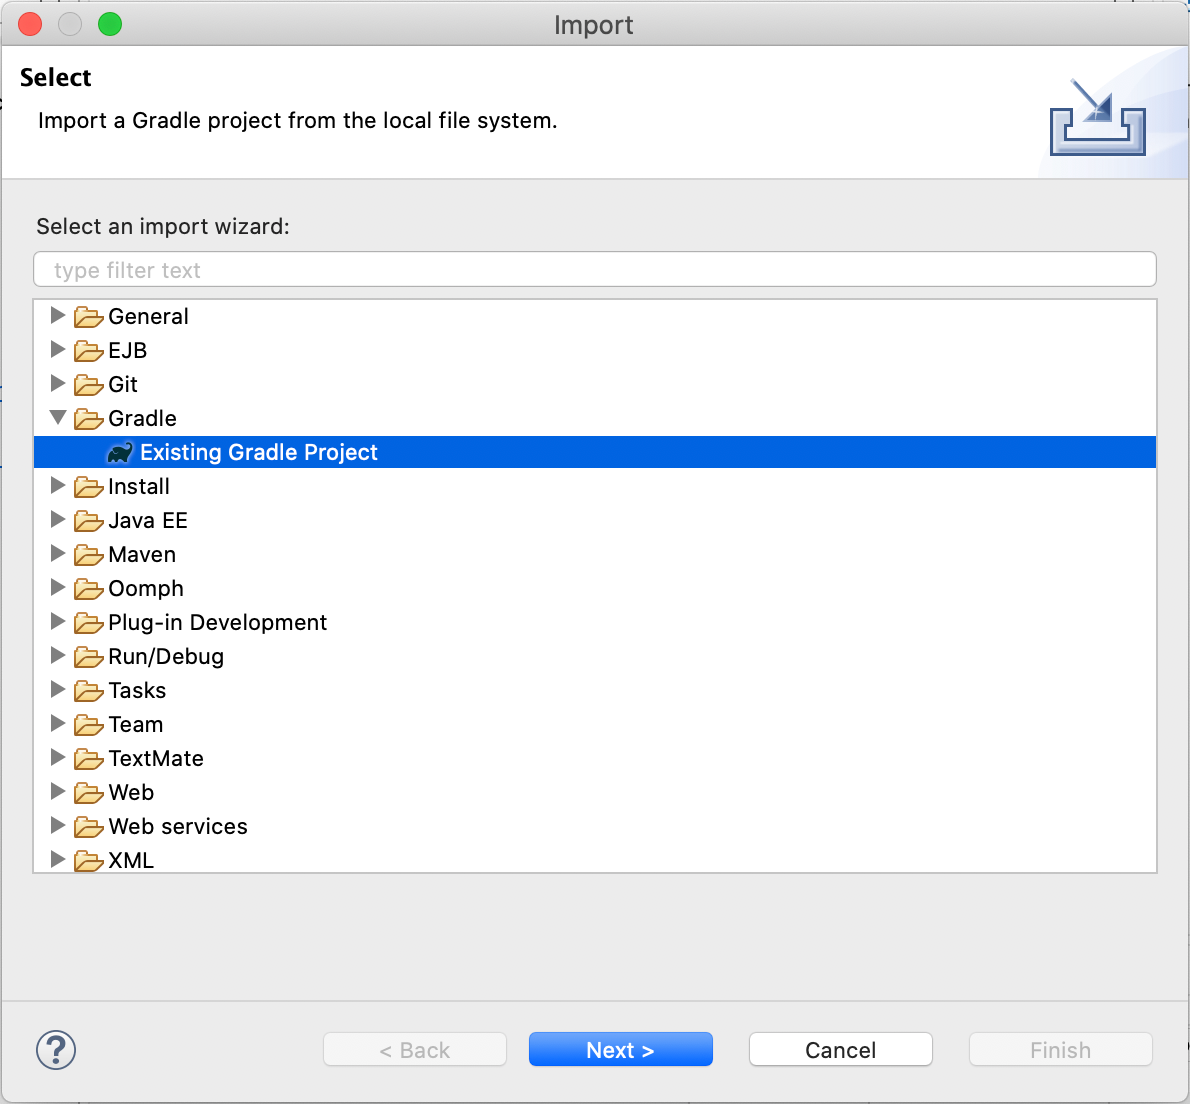
In the following dialog, enter the full directory path for one of the ZAP repositories you cloned before and click on ‘Finish’.
Repeat this process until you have imported all of the ZAP repositories.
It is worth noting that some of the zap-extensions add-ons may fail to compile if you do not have the required environment for them. This is to be expected and is not a problem unless you want to work on those add-ons, in which case see their READMEs for more details.
Running ZAP
In the Eclipse Project Explorer navigate to:
- zaproxy / zap / src / main / java / org / zaproxy / zap
Right click ZAP.java and select ‘Run As’ → ‘Java Application’.
ZAP will now start but it will not be set up quite right and may show warning dialogs, so close it and go back to Eclipse.
Select the ‘Run’ menu, then ‘Run Configurations…’ and then the ZAP configuration.
Select the ‘Arguments’ tab, change the ‘Working directory’ from ‘Default’ to ‘Other’ and enter: ${workspace_loc:zaproxy/zap/src/main/dist/}
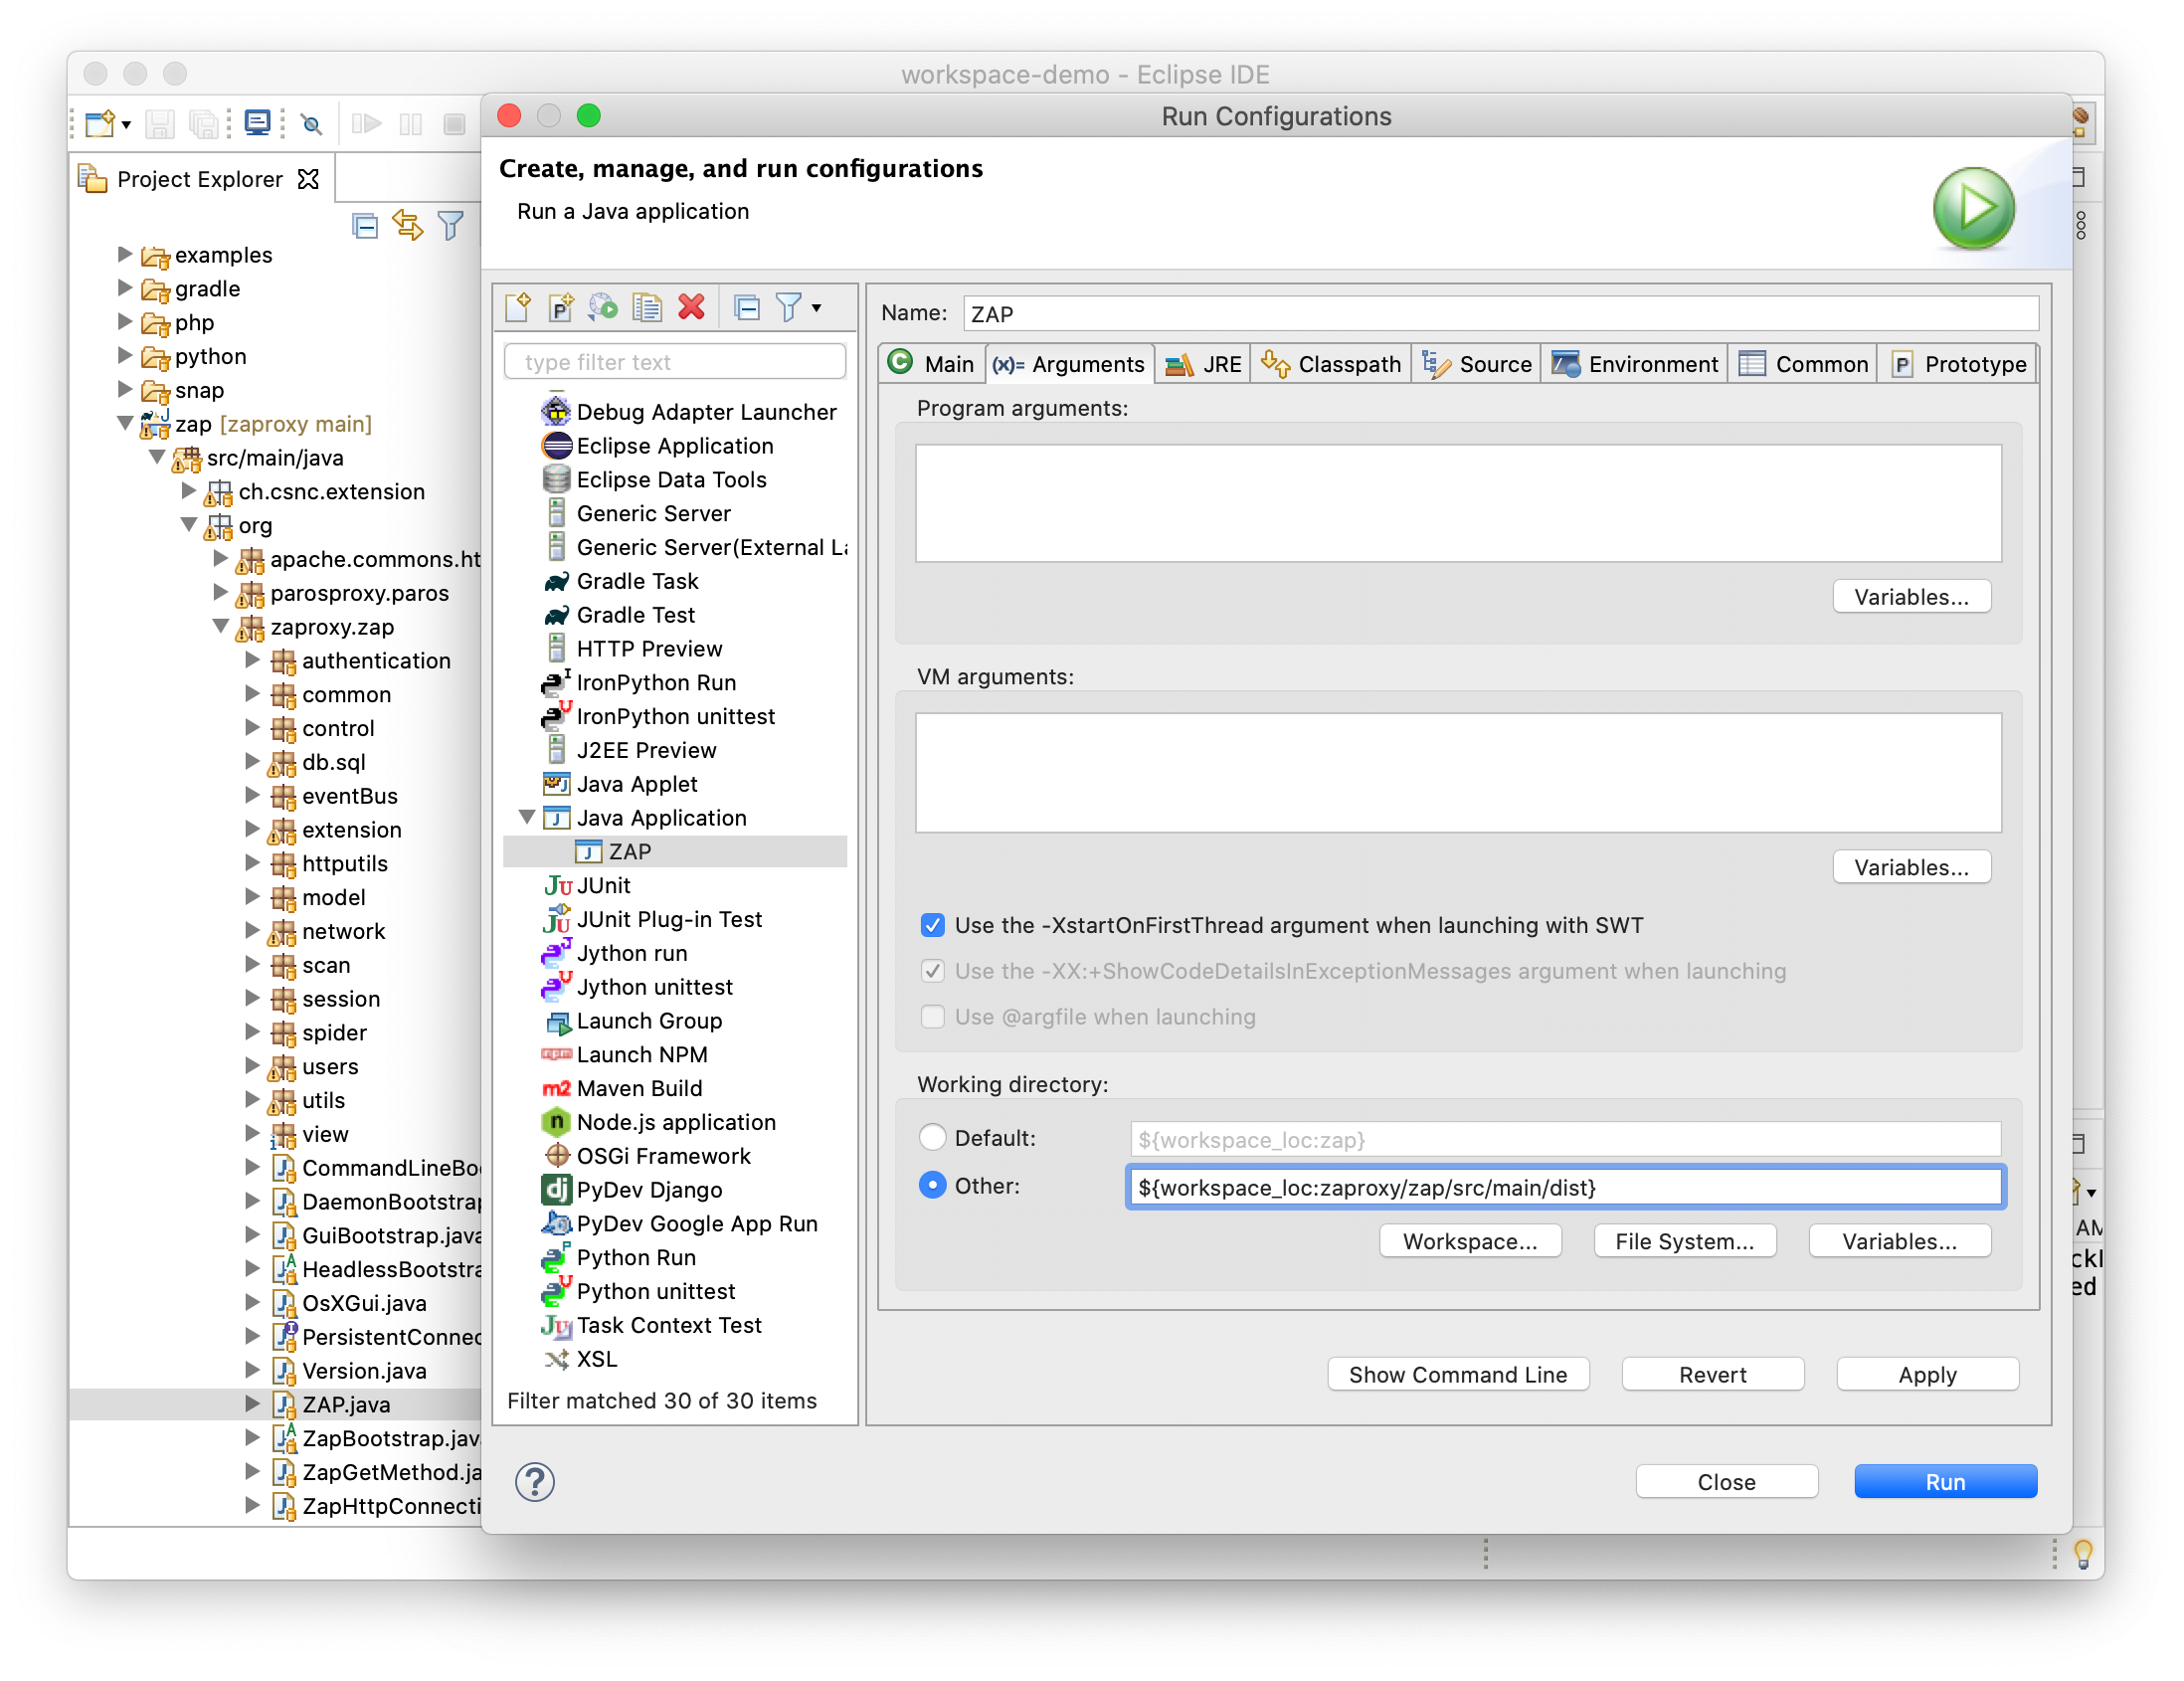
Run this configuration and ZAP should now start with all of the add-ons correctly configured.
Running Gradle Tasks
You can run the ZAP Gradle tasks from the command line or from within Eclipse, the end result will be the same.
Eclipse has a ‘Gradle Tasks’ tab that lists all of the tasks available to you ordered by project. Note that the add-ons in zap-extensions all have their own set of tasks in addition to the top level ones.
Debugging Add-ons
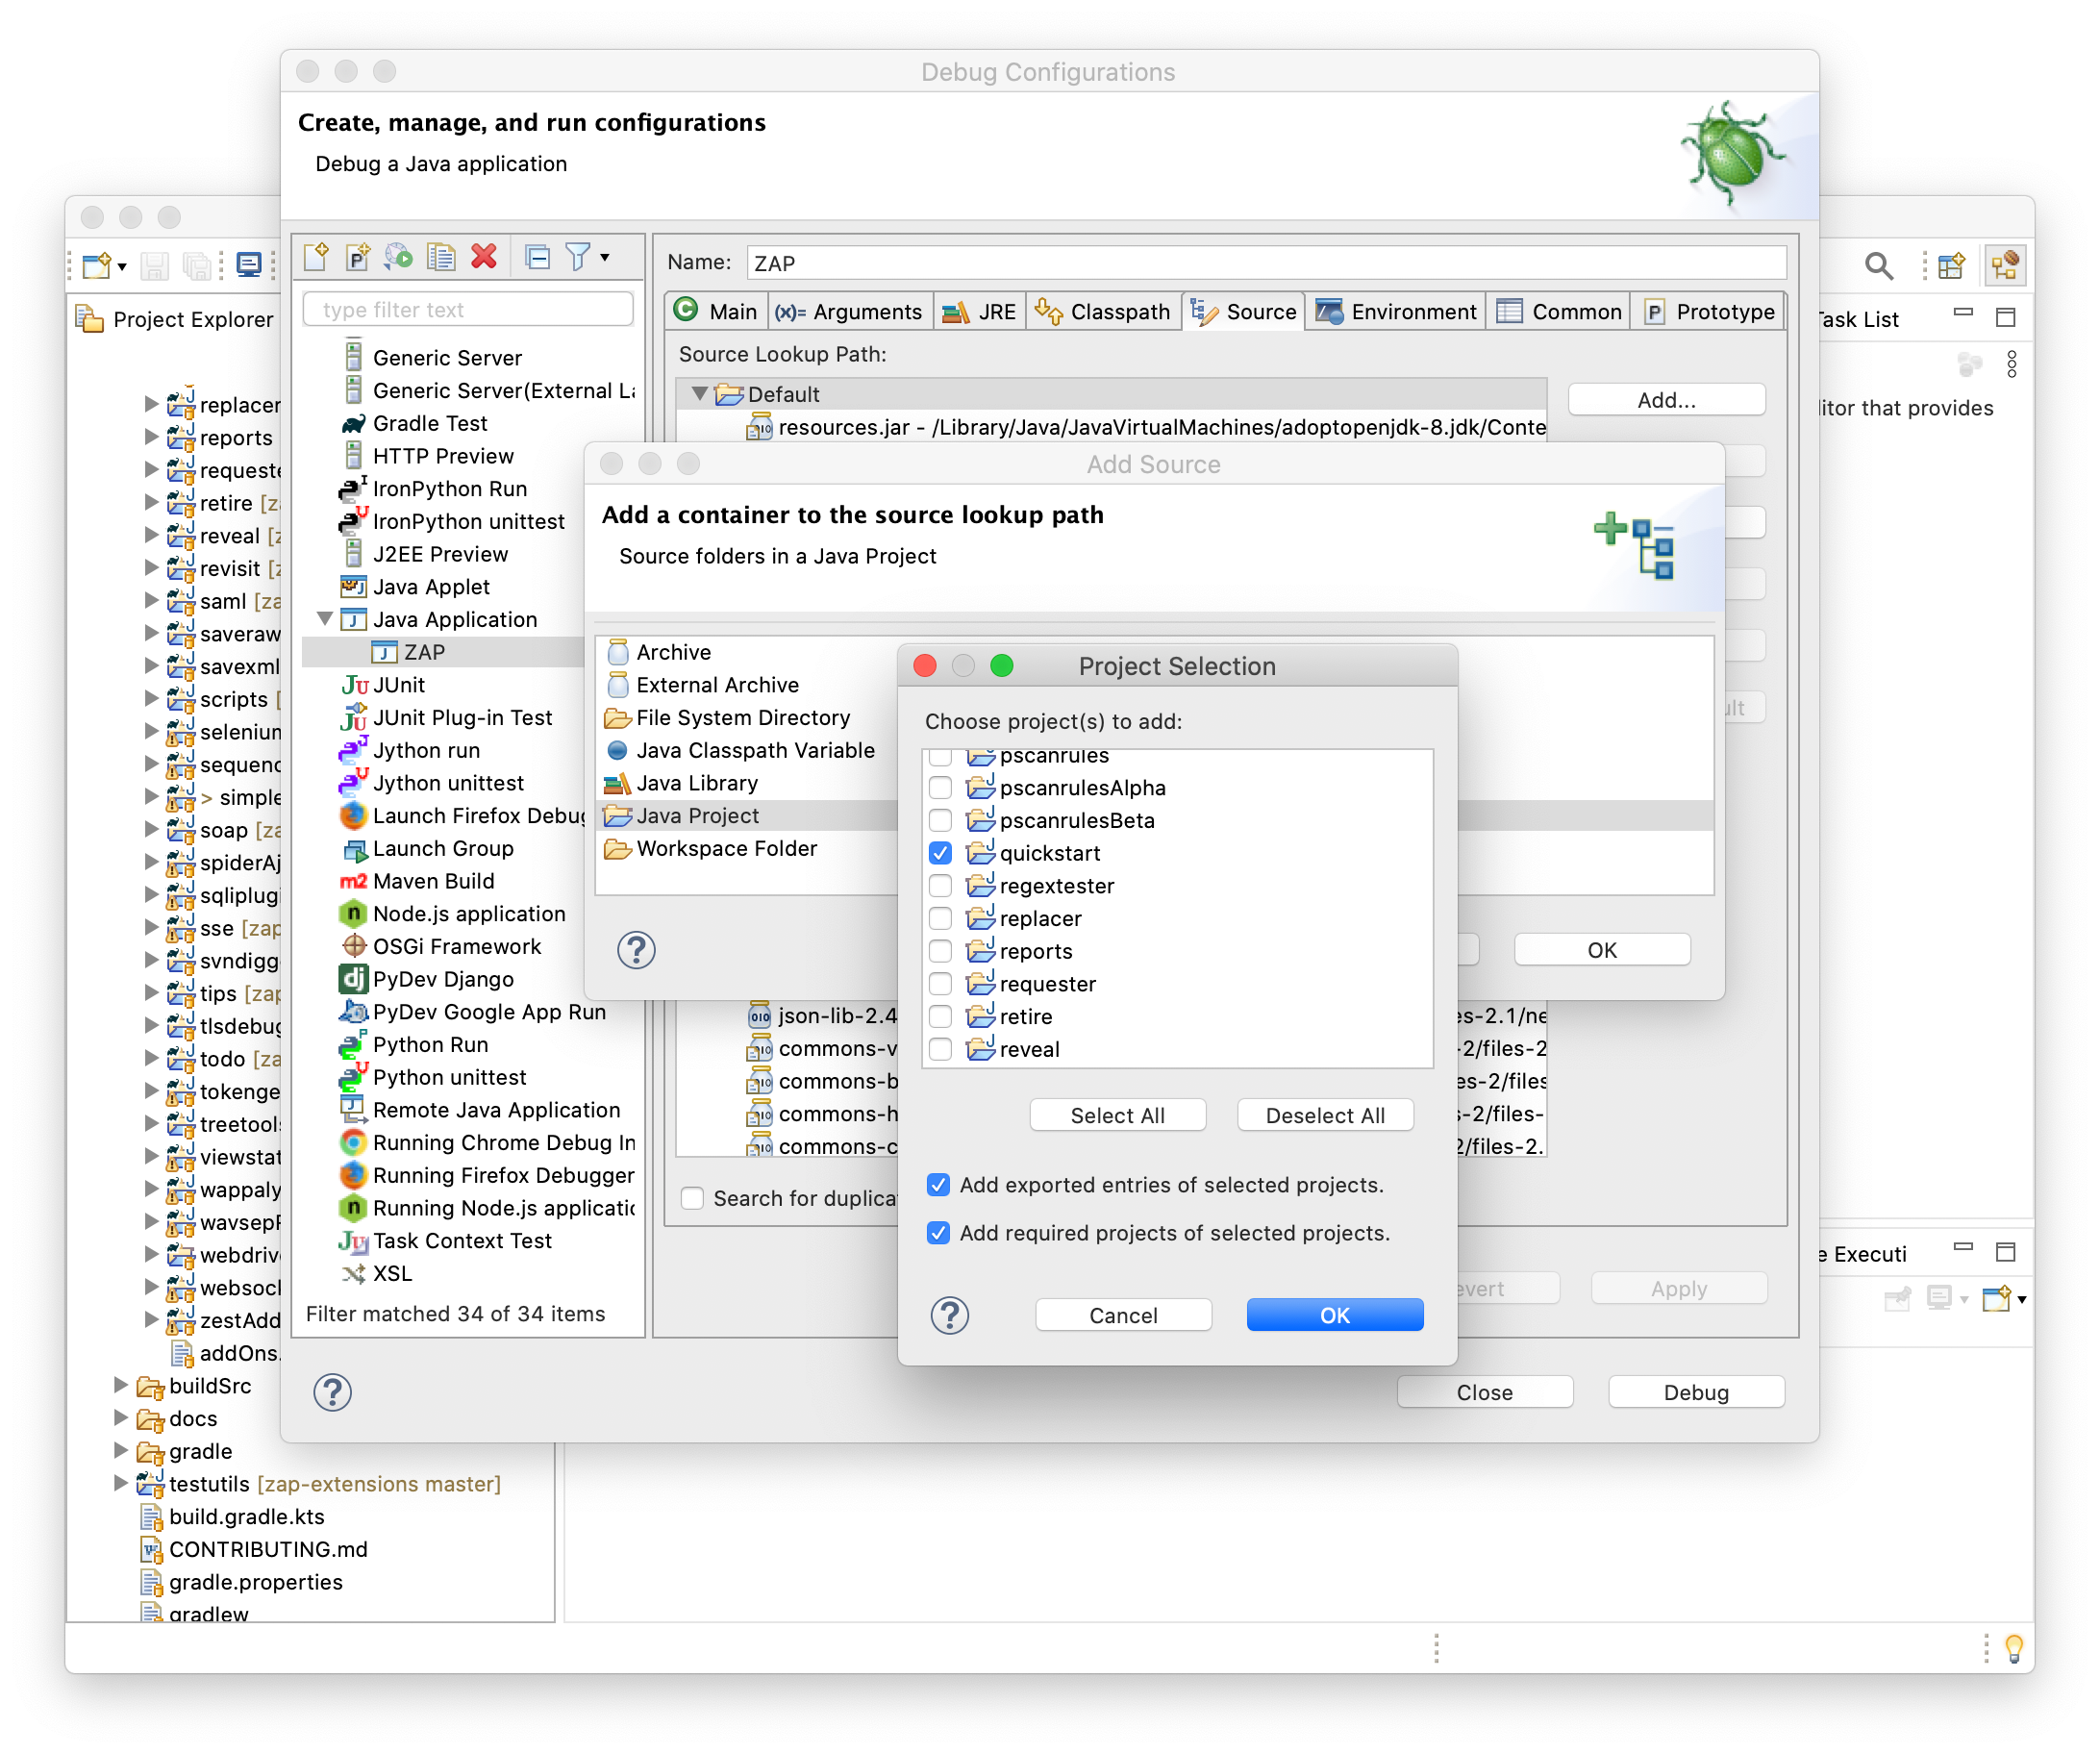
You can debug code in the zaproxy repository without making any changes, but you will need to tweak your configuration in order to debug add-ons.
Select the ZAP runtime configuration as before, switch to the ‘Source’ tab and click on the ‘Add…’ button.
Select ‘Java Project’, click on ‘OK’, and then select the add-ons which you want to be able to debug before proceeding.
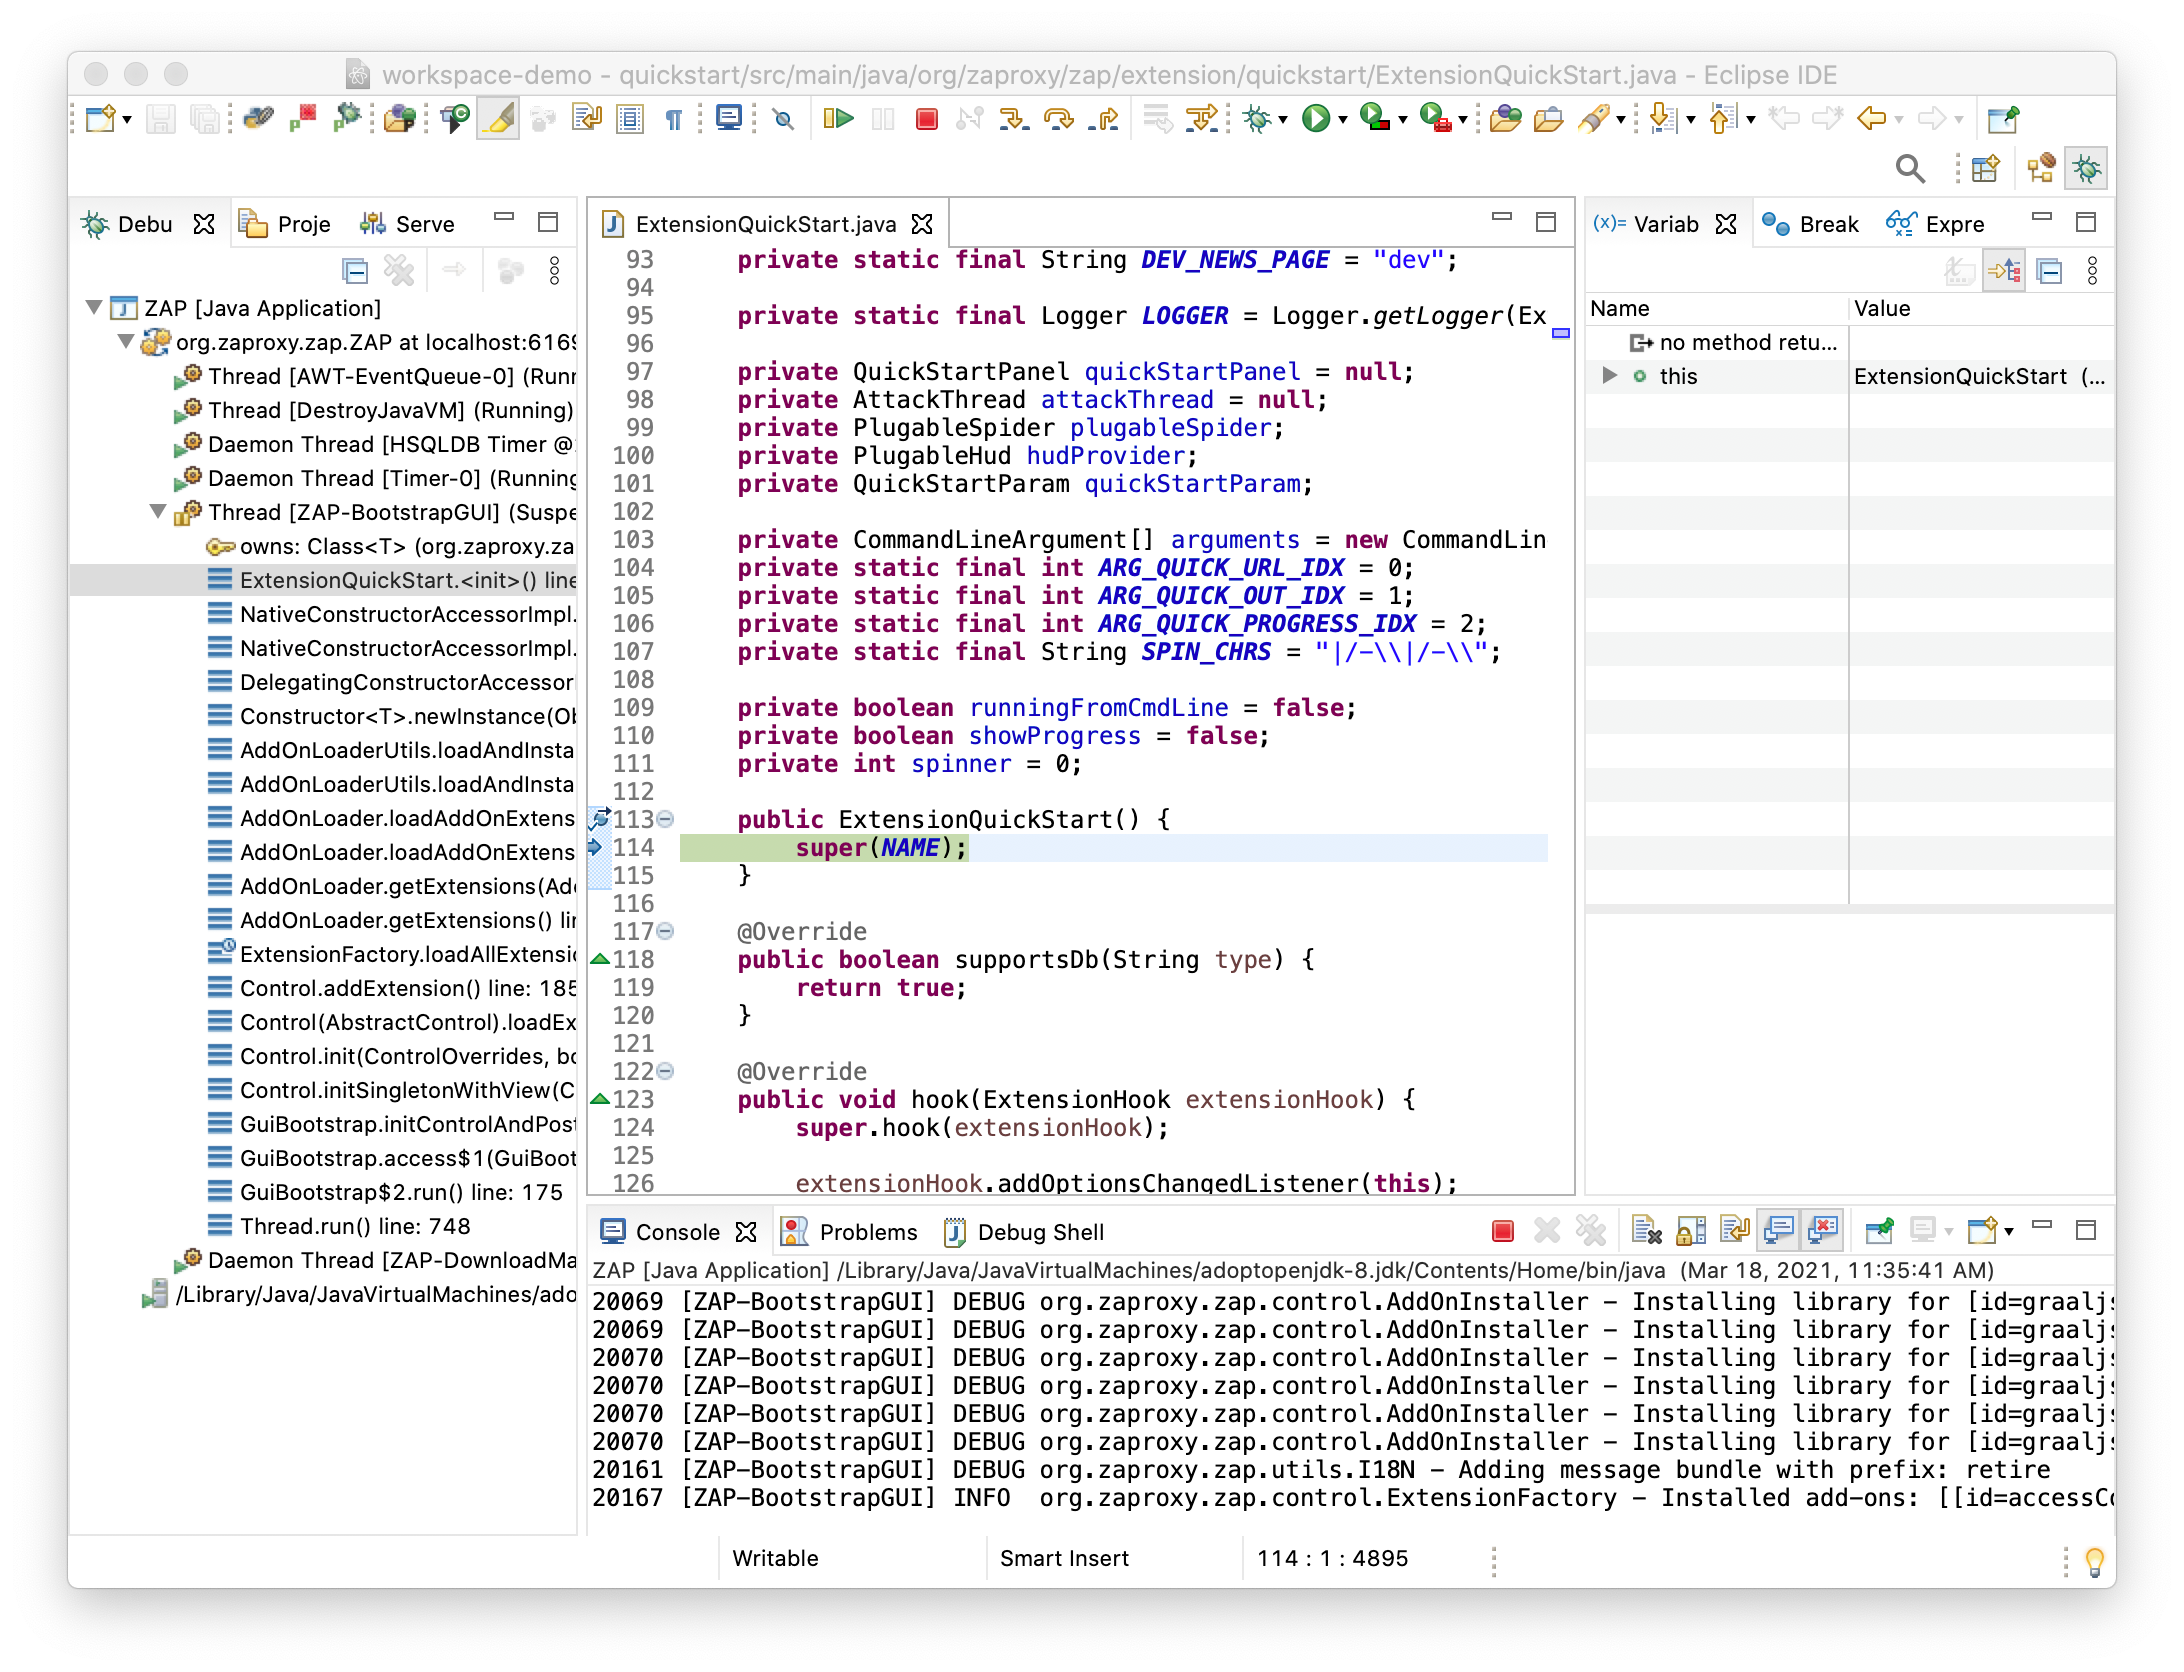
You will now be able to break on code in the relevant ZAP add-ons - in this case in the ExtensionQuickStart constructor in the quickstart add-on.
For details of setting breakpoint in Eclipse see the relevant Eclipse documentation.
Tips and Tricks
Refresh Gradle Project
Sometimes Eclipse will unexpectedly fail to compile ZAP code. This can occur if you switch between git branches which have different dependencies.
If this happens to you then right click the relevant project in the Eclipse Project Explorer and select ‘Gradle’ → ‘Refresh Gradle Project’
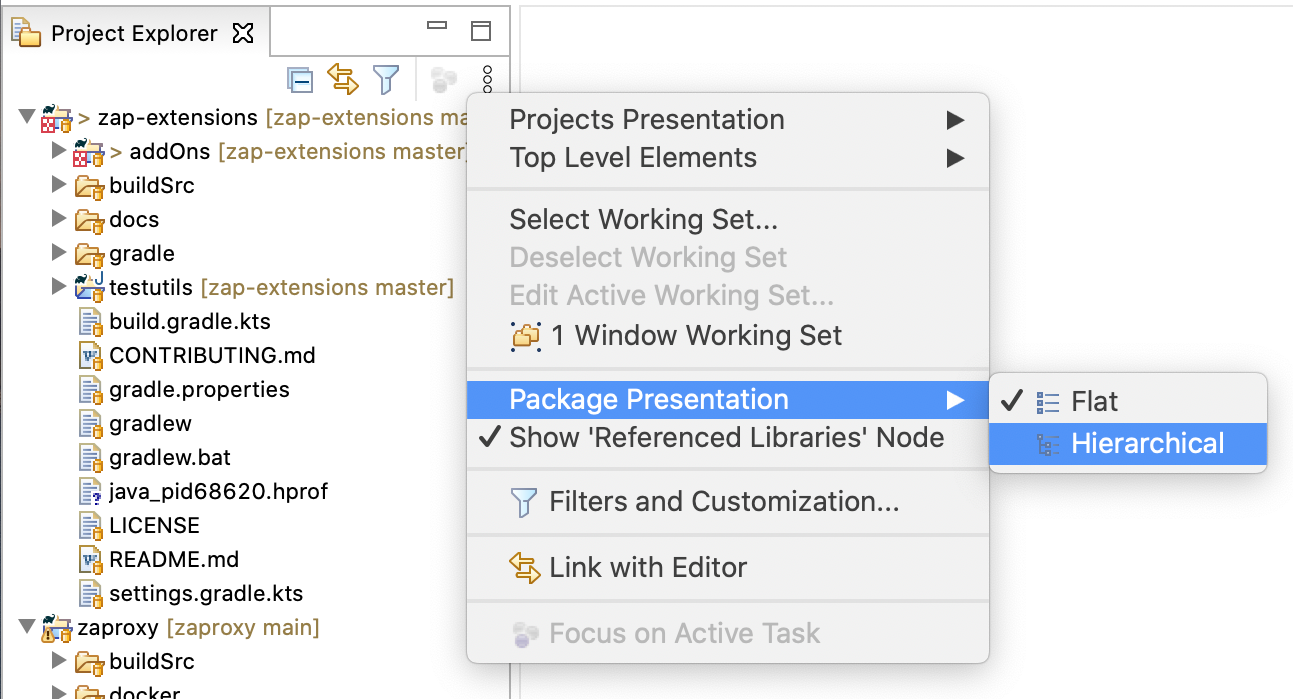
Package Presentation
The default way in which Eclipse displays the package hierarchy does not work very well for ZAP, at least in our opinion.
To change this click on the buttton with 3 vertical dots at the top of the Package Explorer, select ‘Package Presentation’ → ‘Hierarchical’.
Other Tips and Tricks
Do you have any other Tips and Tricks for working on ZAP using Eclipse? If so then send a PR to update this page - you can use the ‘Edit on GitHub’ link in the footer.